Create Business Page on Facebook along with 100+ other Directories
TribeLocal can help you build 100+ online listings in Top Business directories and Local Citation Sites.
Get Local Presence for your Business & start generating more leads online
( starts at $0, no credit card )
The World’s Largest Social Networking Site, Facebook

Facebook has quite literally revolutionized the way we look at social networking. With over 700 million active users, it is definitely the biggest platform you can get if you seek to engage with many people simultaneously.
Facebook is the premiere social networking platform that holds a lot of potential for businesses. It has really changed the way people go about promoting their business. With so many people with varied interests available on a single platform, there is something for everyone. The fact that it can help businesses in growing and reaching out to a new customer base has added to its popularity.
Starting your business page on Facebook actually costs you nothing, in fact, it helps you gather more leads, reach a targeted audience and build brand loyalty along with increasing your web traffic and boosting your SEO. It’s no longer a “good idea” for most businesses to be on Facebook. With 829 million people actively using Facebook every day, it has become a go-to component of almost any inbound marketing strategy.
Creating a Facebook page for your small business is easy and something all new businesses should do. So here we’ll walk you through the step-by-step instructions to set up your business page on facebook.
Step-by-step instructions to add business page to Facebook

Step 1: Get Started
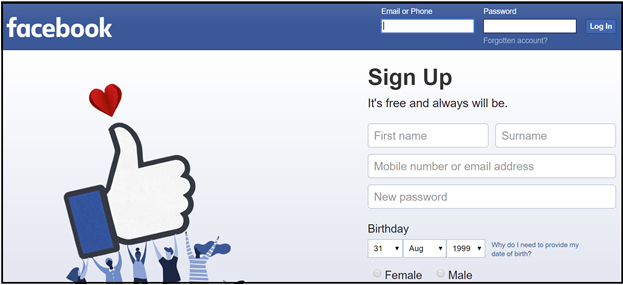
Visit Facebook and start by creating an account. For that, enter the necessary details such as:
- Name
- Phone number
- E-mail address
- Password
After filling the above details, select your DOB from the drop down menu and proceed by clicking on “Sign Up”. Proceed by logging in.

Step 2: Scroll right
Click on the downward arrow in top right corner and select ‘Create Page’ from drop down menu.
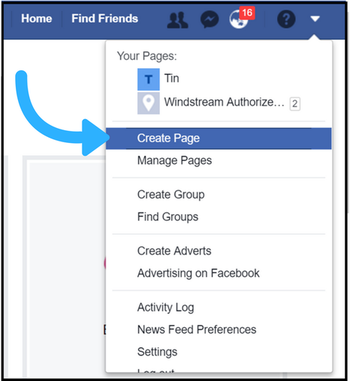

Step 3: Choose Category

Select a category that suits your page. Each of these classifications provide more relevant fields for the Desired Page.
The categories include:
- Local Business or Place
- Company, Organization or Institution
- Brand or Product
- Artist Brand or Public Figure
- Entertainment
- Cause or Community.

Step 4: Local Business or Place
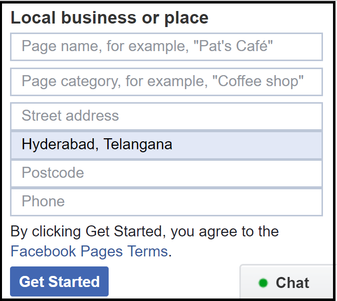
Once we click on local business or places, the following dialog box will appear before you. Here you have to specify:
- page name
- page category
- street address and city
- postal-code
- phone details
After filling in all the details, click on “Get Started” button.

Step 5: Company, Organization or Institution
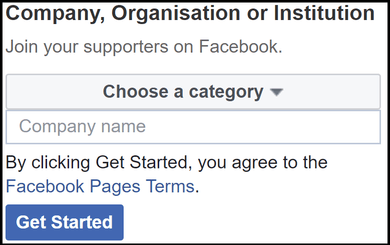
Once we click on company, organization or institution, you are required to choose a category best suited for your Company.
After submitting all details appropriately click on “Get Started” button.

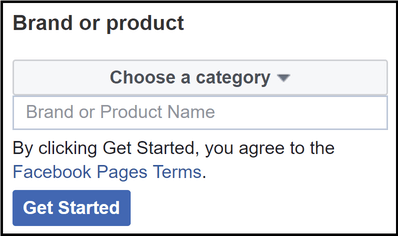
Step 6: Brand or Product
If you click on Brand or product, following dialog box will open. From here you can your category here and your product or brand.
After submitting all details correctly click on ‘Get Started’ button.

Step 7: Artist, Band or Public figure
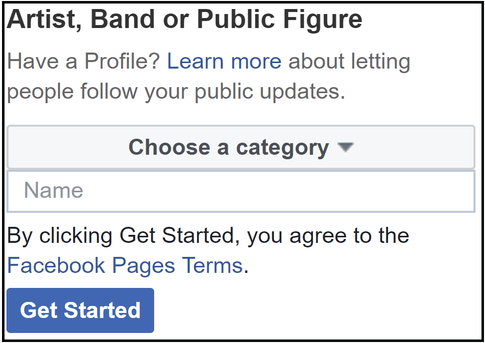
Now make a proper choice of your category and proceed by clicking on ‘Get started’ button.

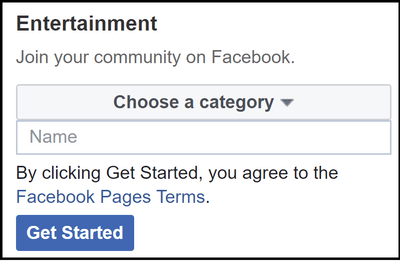
Step 8: Entertainment
Choose a category for your entertainment means and proceed to do other necessary formalities as before.

Step 9: Cause or Community
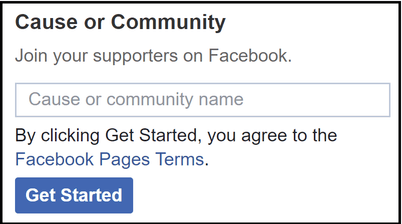
To join your supporters on Facebook Write “Cause or Community Name” and in the last click on ‘Get Started’.
Congratulations!! Our Facebook business page is created, now you can have a look at your business page whether it is created successfully or not by using the search feature.
Get Free Business Listing with TribeLocal

add business lisitng with tribelocal
Know More…

add business lisitng with tribelocal
Know More…

add business lisitng with tribelocal
Know More…

add business lisitng with tribelocal
Know More…

add business lisitng with tribelocal
Know More…

add business lisitng with tribelocal
Know More…


