TribeLocal can help you build 100+ online listings in Top Business directories linked Bing Places for Business, and other Local Citation Sites.
Get Local Presence for your Business & start generating more leads online
Follow these steps to get listed in
Bing Places For Business
TribeLocal makes it easy for Agenices,
MultiLocation Brands and SMB’s to Create 100+ online Listings with 24hrs!

Get Listed in Bing places for business along with 100 other directories!
About Bing
Local SEO and local online marketing is an excellent way to help local consumers connect with your business. Those who are local are more apt to go with your services because it is more convenient and easily accessible, and therefore local businesses are often trusted. This makes listing your business in Yelp, Yahoo Local, and Google+ Local very important, but don’t forget Bing’s initiative – Bing Places for Business. Now it is very easy to get free business listing on Bing.
The world’s third largest search engine (after just Google and YouTube) changed Bing Business Portal to Bing Places for Business in April 2013, but the general idea remains the same. Bing Places for Business is a place to connect your company with local consumers in a quick and easy way by simply listing your business with the search engine.
Steps to Add Business on Bing Places

Step-1 Get Started
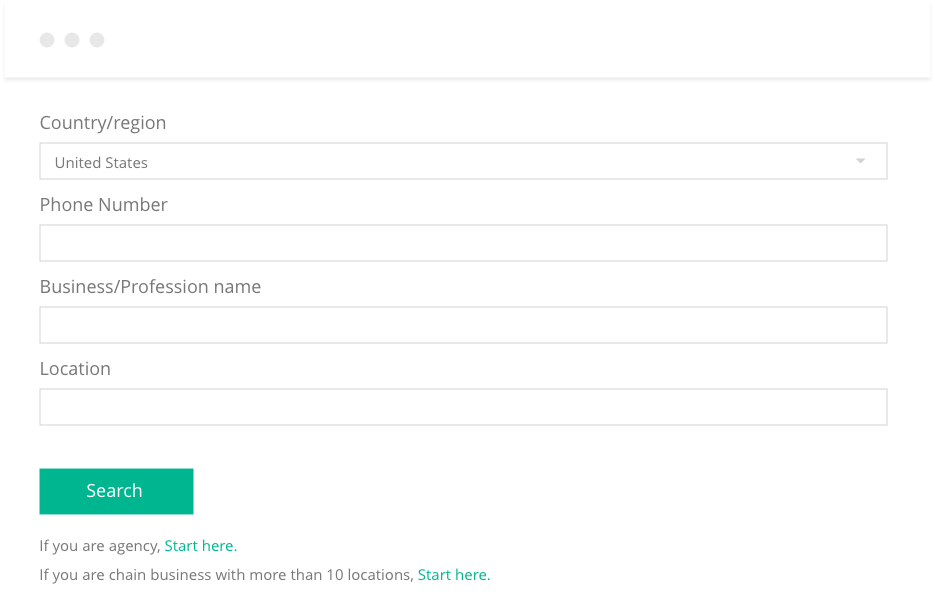
Go to Bing Places For Business (http://www.bingplaces.com/). Click on Get Started. The screenshot below is the welcome screen you will see, and if you look in the top right corner you can see that you can sign in easily once you’re listing is created.
Next, you will see the following page.
- Type in your business phone number into the field labelled Phone number.
- You could also type in your Business/Professional Name and Location of your business.
- Once you complete the process of adding details in the form, click on “Search” button.


Step-2 Claim your Business
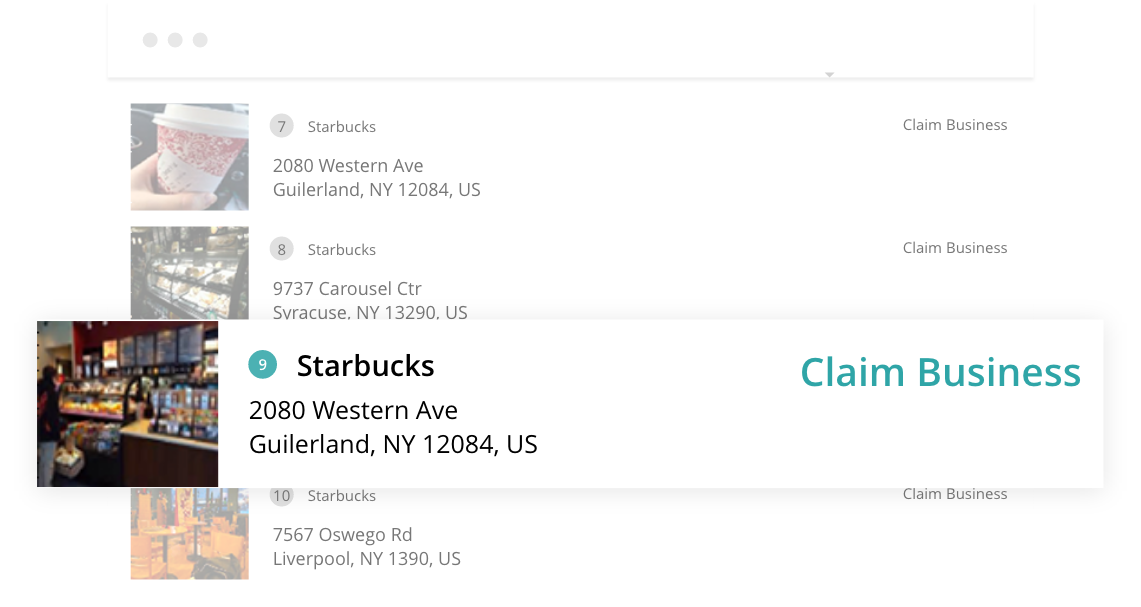
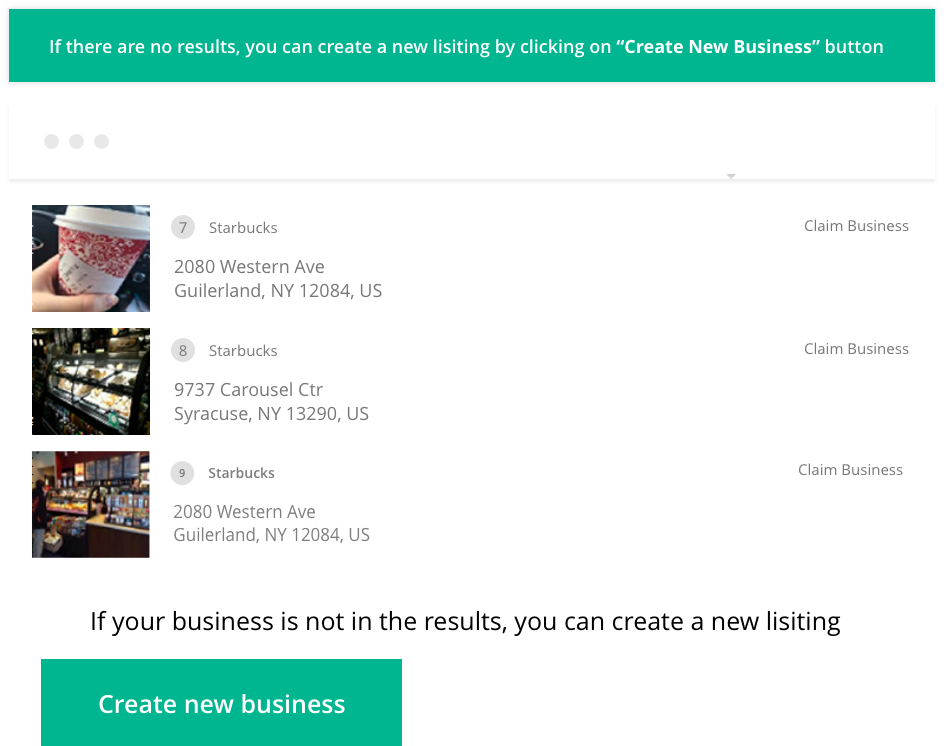
After you search your business, search results should return your business listing. Check all the details from the list of businesses and identify your business. After you find your business listing, click on “Claim Business“.
- Click on the green Claim Business link present next to your business name.
- You will then be directed to a login page if you haven’t logged into your Microsoft account already. Login to your account and move to the next page.
- Create an account if you don’t have a Microsoft account. And login.


Step-3 Cross check your Business Information
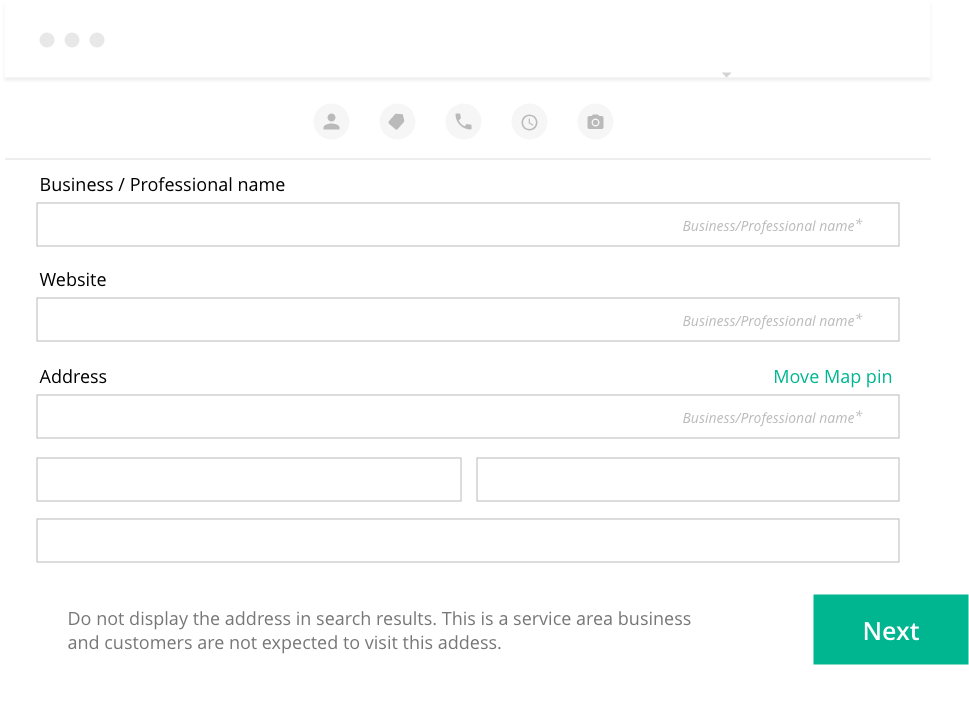
On the left-hand side of the page, you will see a box where you can enter your Business information. Most of the information is already filled in but do make sure to verify if it’s correct.
Click on Next to move to the next section. And click on Submit after you are done with the information presented.
Step-4 Verify your Business Listing
Now you’ll see preferred ways of verification the business profile that you in fact are the owner of the business you are claiming.
Use any of these methods to receive your Verification code.
After verifying your business, you shall receive notification from Bing Places for Business confirming that you have successfully claimed your business.
Sometimes, the verification process can take up to sometime to complete.

Get Free Business Listing with TribeLocal

add business lisitng with tribelocal
Know More…

add business lisitng with tribelocal
Know More…

add business lisitng with tribelocal
Know More…

add business lisitng with tribelocal
Know More…

add business lisitng with tribelocal
Know More…

add business lisitng with tribelocal
Know More…


